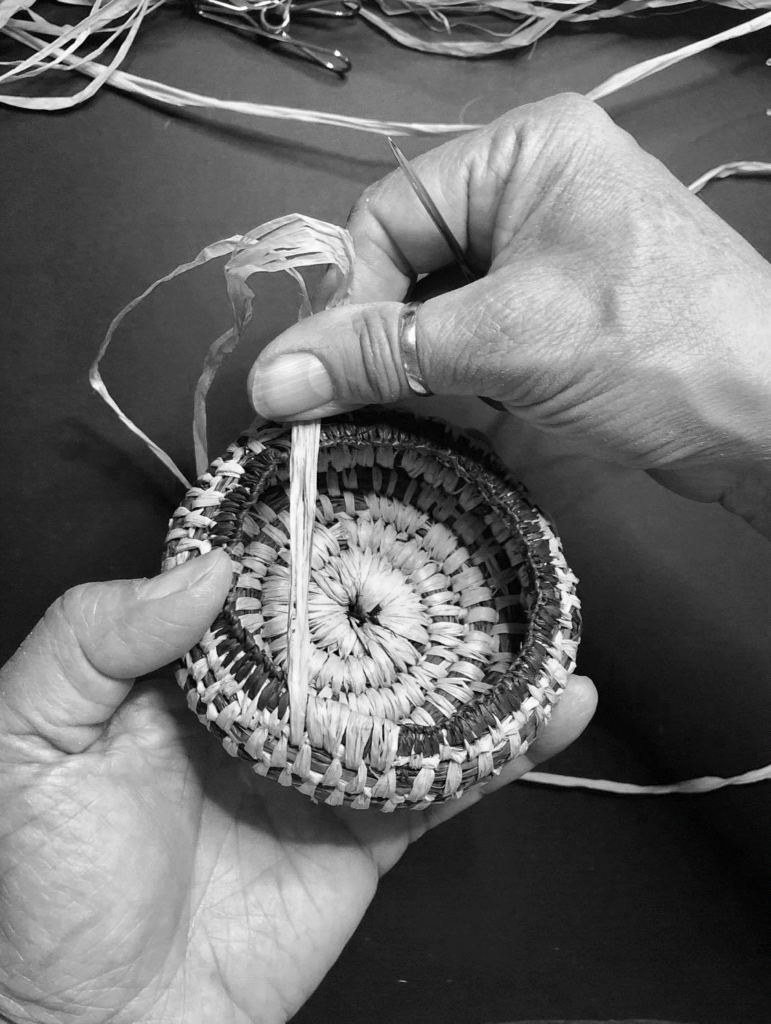
Create your own object
Have you completed the form to receive the materials to create your own woven item?
You do not have to use the materials that are provided in the Oorala resource pack. You may find your own, or you may incorporate bark, grasses and other natural resources from your local environment into your finished item.
On this page are the step by step instructions to guide you if you are a beginner at weaving.
OYP WEAVING step by step BOOKLET
Materials required
- Raffia or native grasses
- Weaving needle (large-eyed embroidery , beading or tapestry)
To begin the centre of a basket or round object, start with the ‘magic circle’.
Weaving our Way – Starting a Magic Circle
Weaving our Way -Finishing a Magic Circle
Have fun
Once you have completed one object you can do the same thing again using other materials.
Topics in this lesson:
STEP 1
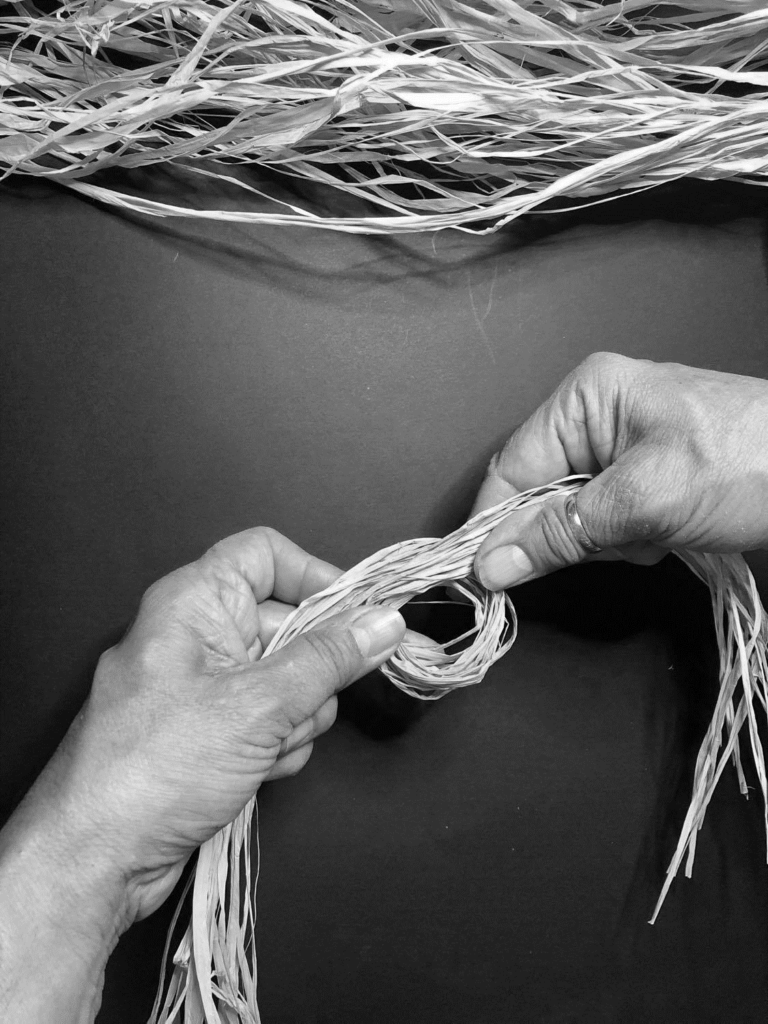
Select 5 – 10 pieces of raffia and create a loop near one of the ends
STEP 2
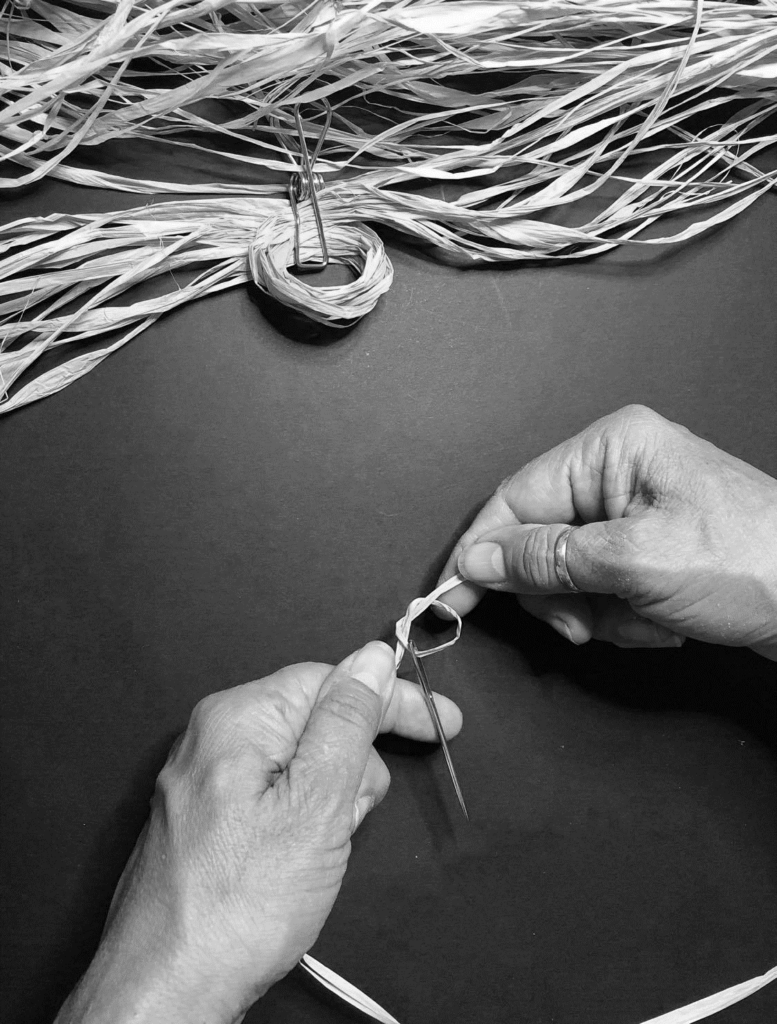
Thread a single piece of raffia onto you needle.
Tie off with a simple knot at one end
STEP 3
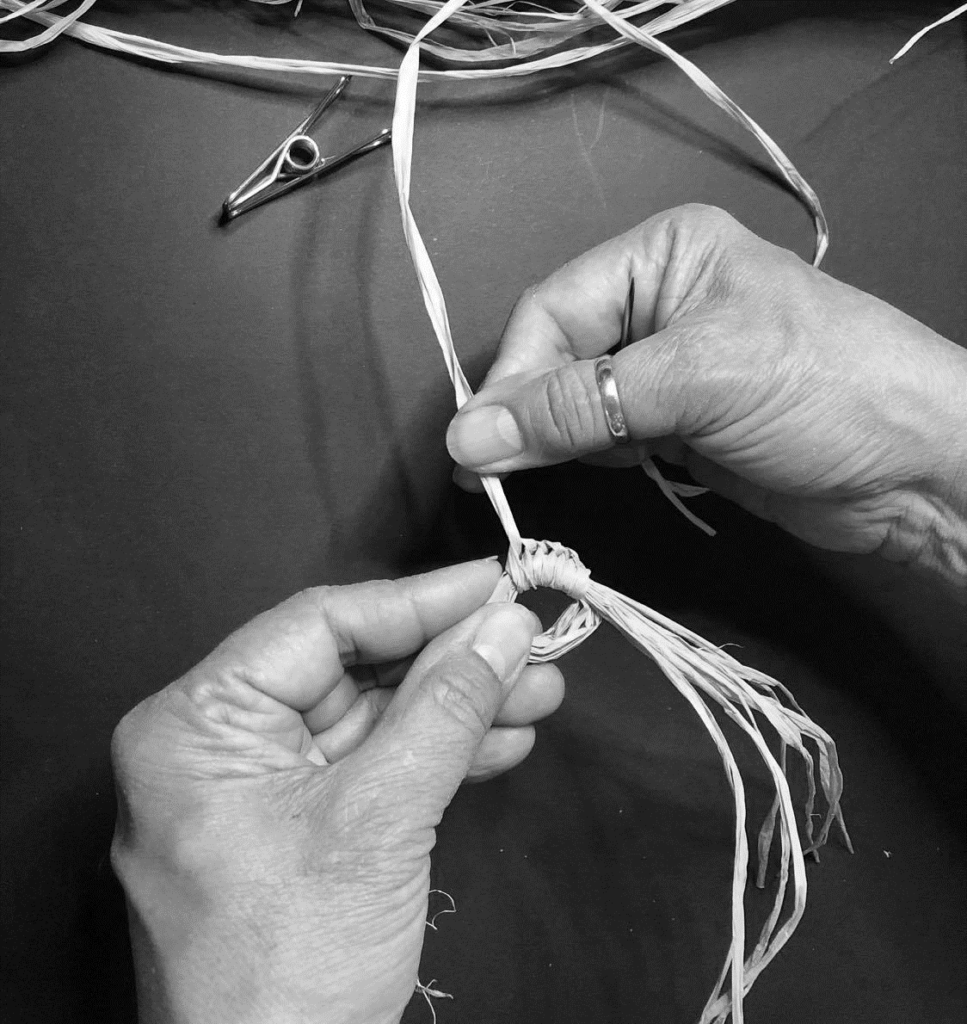
Using a blanket stitch start stitching into the centre of the loop.
Continue working your way around in a circle
STEP 4
Keep stitching around in a circle until the circle is enclosed
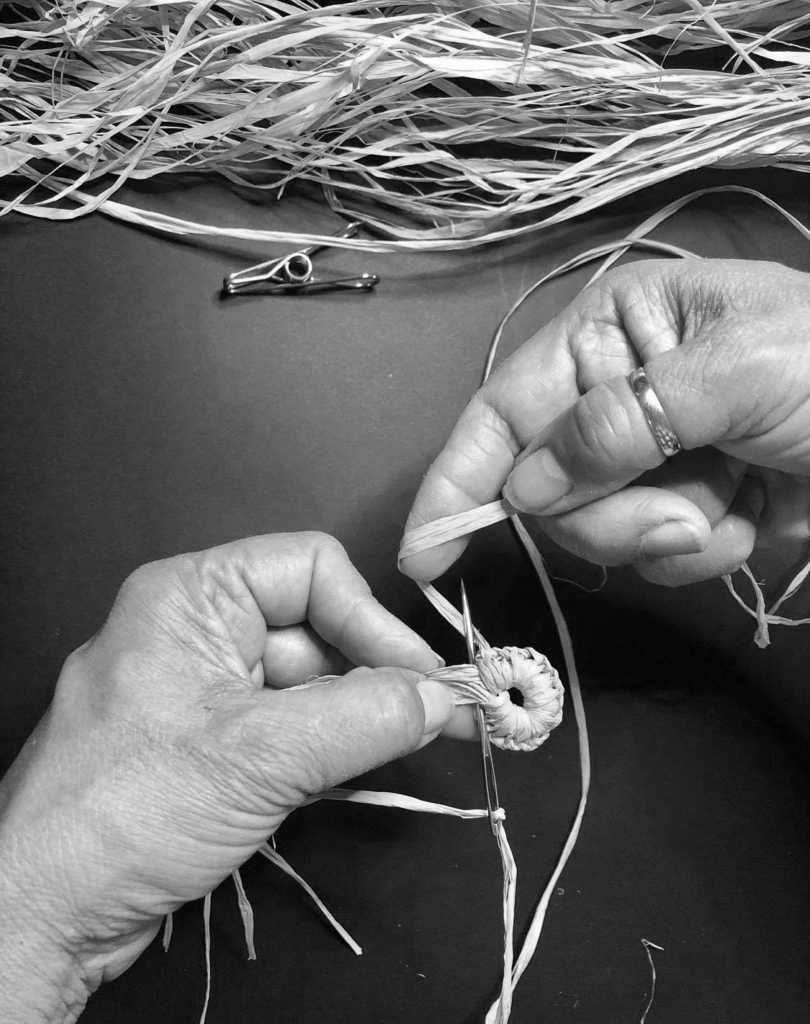
STEP 5
Enclose the circle and start incorporating the next layer of the core.
Stitching through the head of the blanket stitch
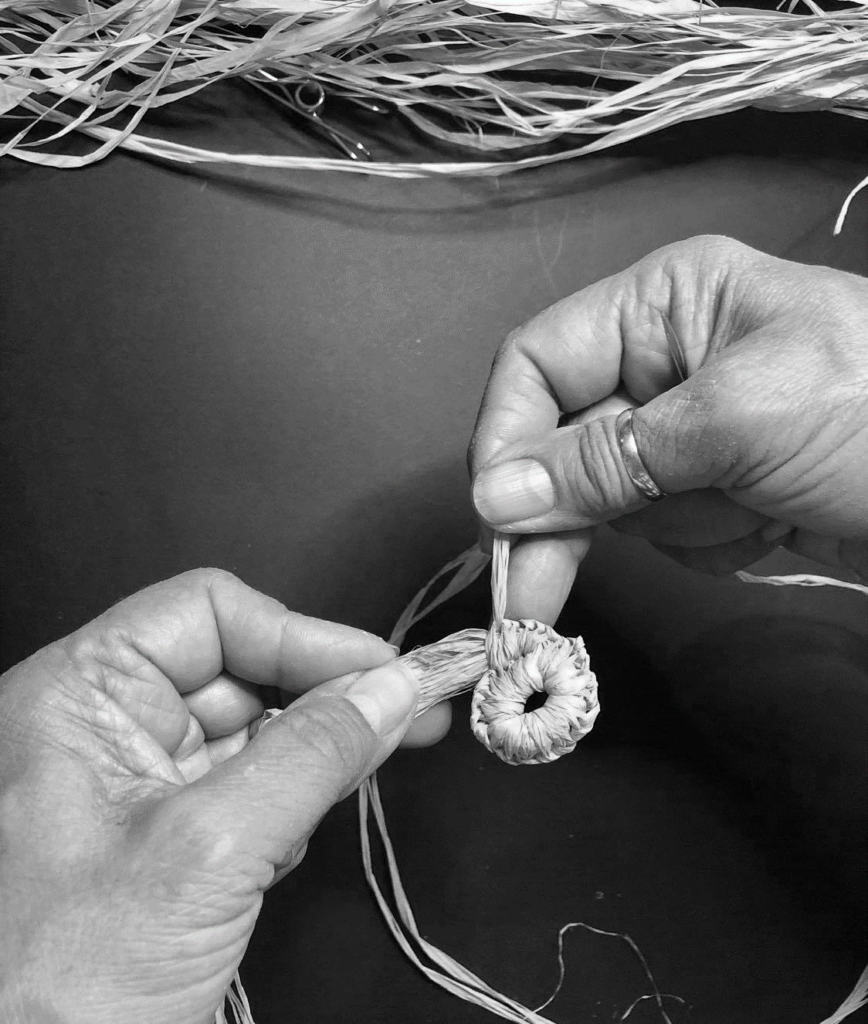
Step 6
Keep stitching around in a circle, making a flat disc of coils like a snail.
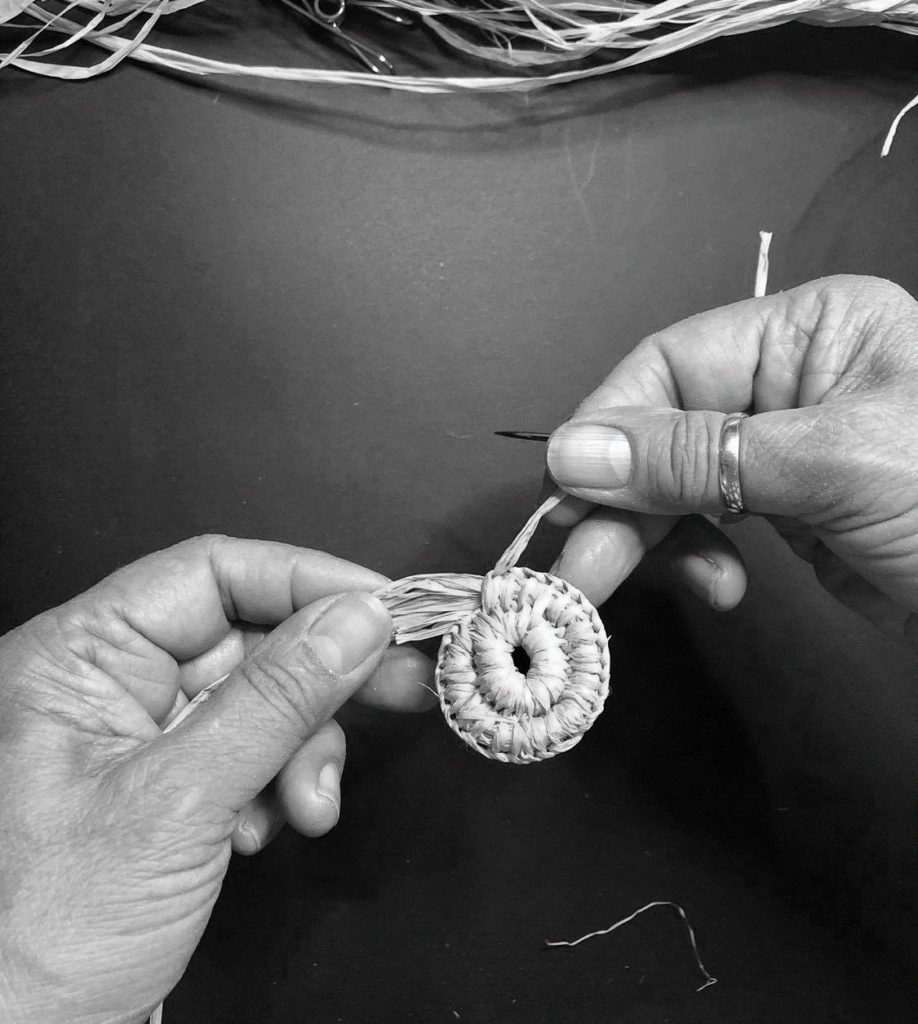
STEP 7
When the raffia tails become too short, simply add more in its place by folding a selection in half and slotting into your stitches.
Keep doing this as you go around.
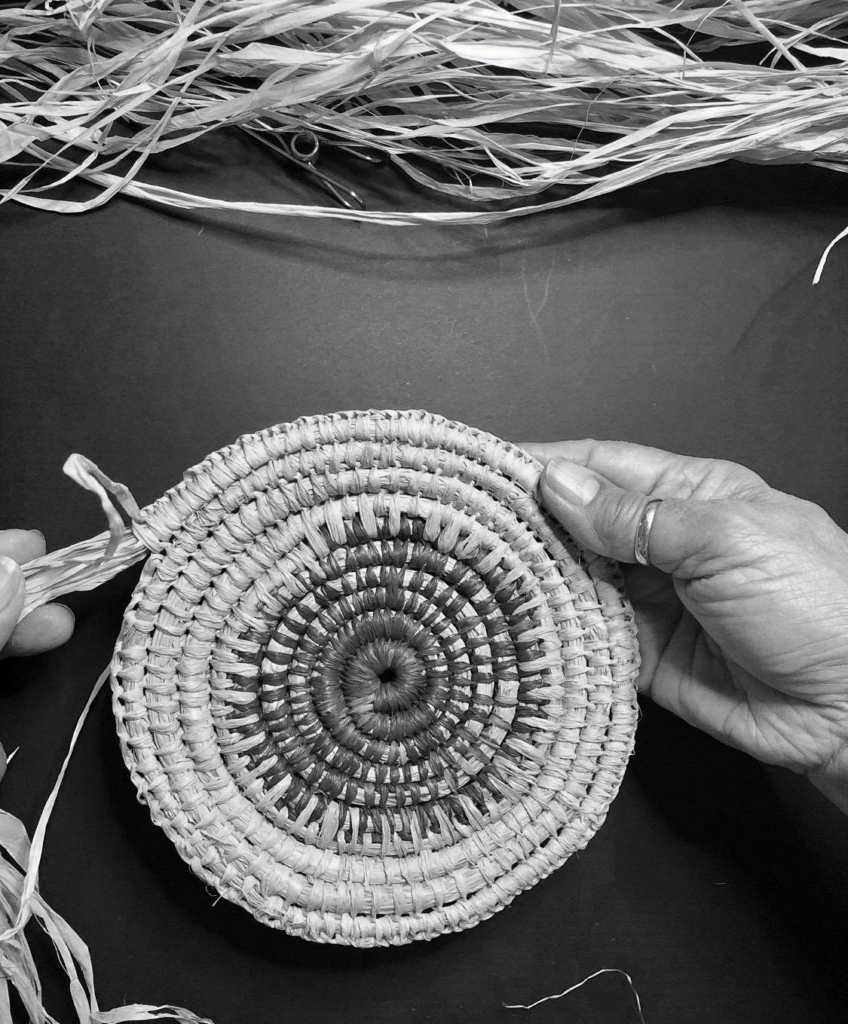
STEP 8
To build the sides of the basket up, start coiling the raffia on top of the previous coil and continue to stitch as before
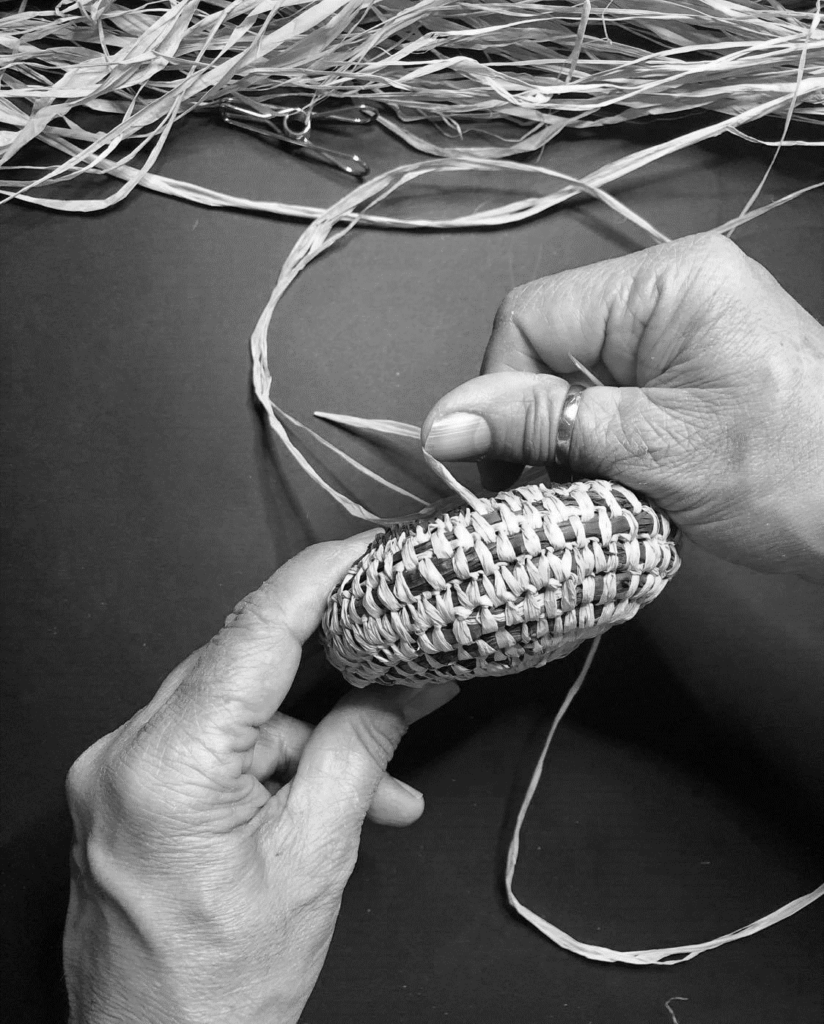
STEP 9
When you are happy with the height of the basket, cut off the tails
And stitch over the end.
